The Night Shift in Your Garden: A Seven-Evening Pest Investigation Before You Spray
At dusk, a garden changes personnel. Bees withdraw, moths begin their rounds, slugs cross damp paving and beetles emerge from places that looked empty at noon. By morning, a basil leaf may have a new crescent missing from its edge or a seedling may lie across the soil. The temptation is to treat the most visible creature as the culprit and reach for a spray. That shortcut often solves the wrong problem.
A damaged plant is a scene to investigate, not proof against the first insect found nearby. The organism on a leaf might be feeding, hunting the feeder, resting or simply passing through. The wound might be old, caused by wind or linked to the plant’s growing conditions. A useful garden pest investigation separates observation from assumption and asks a practical question: is damage increasing enough to justify action?
Seven evenings provide enough repetition to notice patterns without turning the garden into a laboratory. The process below is designed for ordinary homeowners. It favors identification, prevention and low-disruption tactics. If a pesticide is ever considered, the product label, local rules and site-specific safety conditions—not an internet recipe or a guess—must govern every decision.
Why the night shift deserves an investigation
Daytime inspections catch sunlit symptoms but miss many active hours. Caterpillars may feed after dark. Slugs and snails travel when surfaces are cool and damp. Earwigs, ground beetles and spiders may also be visible, yet their roles differ: some consume plants, some consume other invertebrates and some do both depending on circumstances. A single snapshot cannot establish which relationship matters.
Repeated evening observations add three dimensions that a photograph lacks: time, movement and change. You can see whether fresh damage appears between checks, whether the same organism is repeatedly associated with it and whether the plant continues growing despite cosmetic loss. This prevents a few harmless holes from being treated like a collapsing crop.
The aim is not a perfectly insect-free garden. Such a garden would also lose pollinators, decomposers and predators. The aim is to keep valued plants acceptably healthy while avoiding unnecessary disruption to the small food web that performs much of the garden’s pest control for free.
Prepare a safe, simple field kit
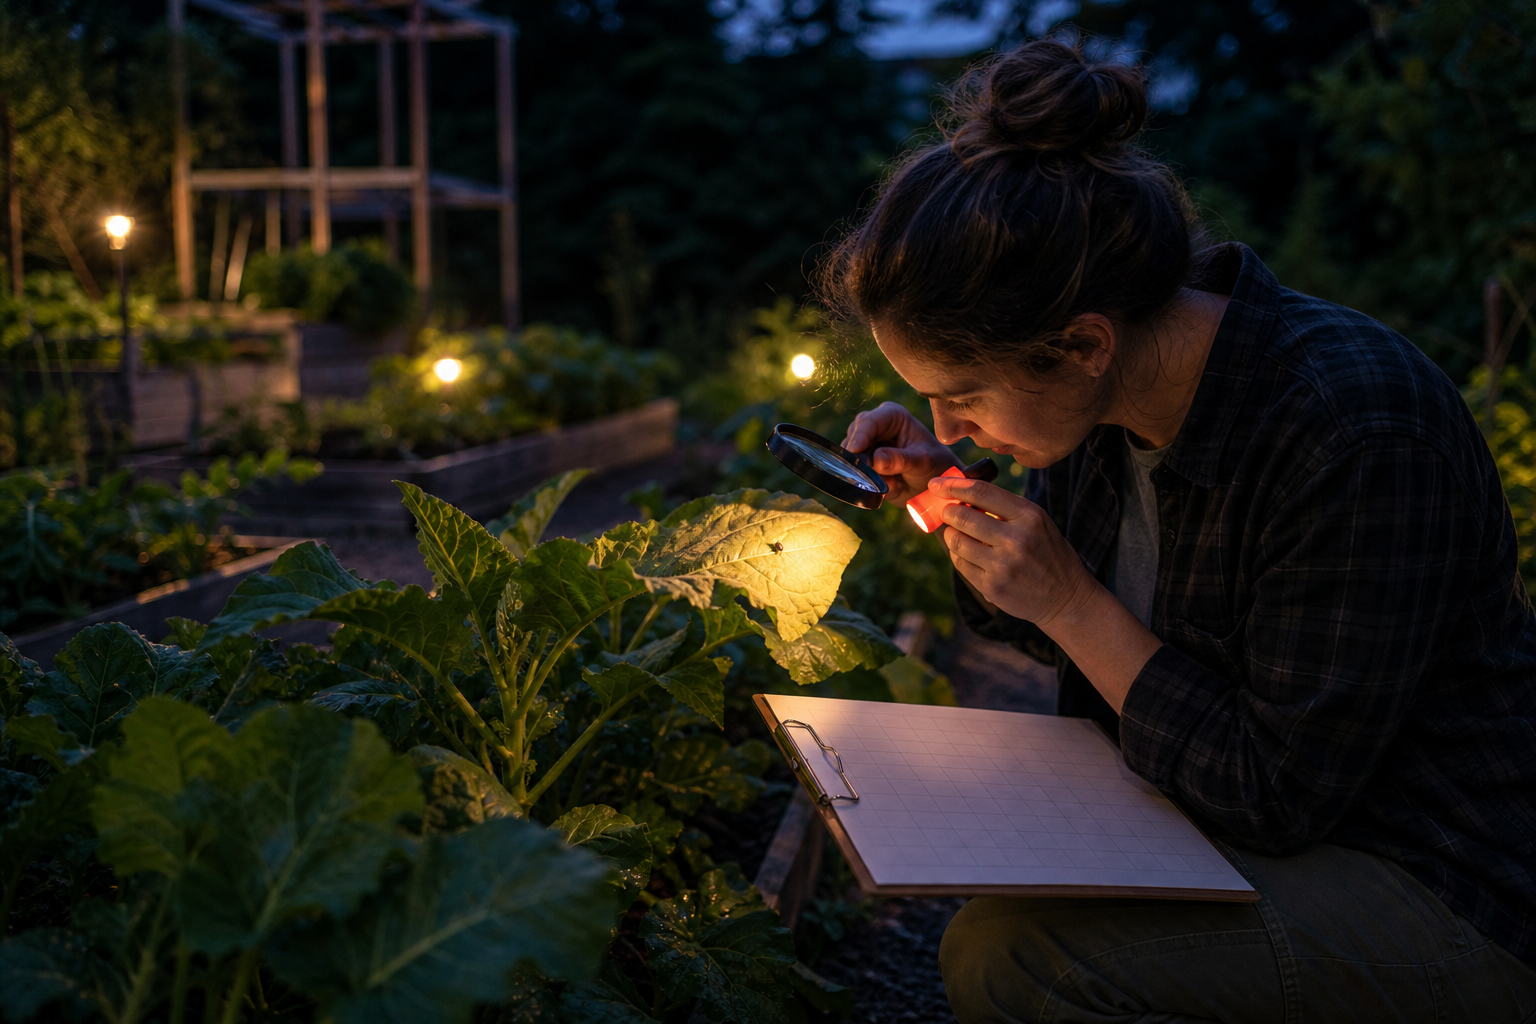
You need a notebook or note-taking device, a pencil, a flashlight, a small ruler, removable plant markers and a hand lens if one is available. A flashlight with a dim or red setting reduces glare and makes patient observation easier. Use a phone camera for close views rather than collecting an unknown organism. Photograph the whole plant first, then the damaged part and finally any organism nearby.
Wear closed shoes on uneven ground. Use suitable gloves when moving fallen pots, boards or dense debris, and never put bare hands into a hidden crevice. Do not handle unfamiliar caterpillars, spiders, stinging insects, animal droppings or sick wildlife. Keep children and pets away from the inspection area, traps and any product under consideration. If the garden has poor lighting, steep steps or a known stinging nest, inspect from a safe distance.
Create a basic log with the date, time, weather, plant, exact location, symptom, organism seen and photograph number. Add a confidence line—confirmed, likely, possible or unknown. That small admission of uncertainty is important. It keeps a promising clue from quietly becoming a false fact by the third evening.
Make a daylight baseline before evening one
Begin in daylight when leaf color, growth and planting conditions are easier to see. Mark the plants that concern you, but also choose one healthy plant of the same kind when possible. A comparison plant helps distinguish a local attack from normal aging, heat stress or a garden-wide care problem.
Record the number of affected leaves or shoots and whether damage is concentrated on new growth, lower leaves, one side or the entire plant. Note recent transplanting, pruning, irrigation changes, fertilizer use, storms, mowing or construction. Check whether soil is waterlogged, bone-dry or compacted. Look for rubbed stems, sunscald, broken petioles and splash marks before assigning biological blame.
Draw a rough map showing beds, paths, walls, lights, compost, standing water, dense groundcover and damaged plants. Precision is less important than consistency. The map will reveal whether symptoms track a damp edge, a warm wall, an overwatered pot, a particular plant family or an entrance used by larger animals.
The seven-evening protocol
Evening one: map symptoms, not suspects
Inspect each marked plant at about the same time. Describe the injury without naming a culprit. Useful descriptions include clean holes through the leaf, ragged missing edges, pale stippling, curled new growth, a winding tunnel inside a leaf, clipped stems, wilt despite moist soil or a sticky surface. Mark one or two fresh-looking wounds with a nearby removable tag; do not attach tape to delicate tissue.
Look at leaf undersides, stem joints and the soil immediately beneath the canopy. Avoid shaking every plant, which can dislodge both evidence and beneficial organisms. Photograph what is present, then leave the scene mostly unchanged. Tonight establishes the vocabulary for the remaining checks.
Evening two: establish when damage changes
Compare the marked wounds with the previous images. Has an edge advanced? Are there new droppings, webbing, shed skins, slime traces or clipped fragments? A wound that looks dramatic but remains unchanged may be historical. A small injury that expands nightly deserves more attention.
Return once after sunrise if practical and safe. The contrast helps narrow the activity window. If damage appears overnight while daytime views remain quiet, nocturnal feeders become more plausible. If no new damage appears, continue observing rather than escalating merely because a hole exists.
Evening three: watch behavior before naming roles
Spend ten uninterrupted minutes at the most active plant. An organism actually removing tissue provides stronger evidence than one sitting nearby. Notice direction of travel and feeding position. A predator may stalk along a leaf with damage because prey gathers there. Ants may visit sticky secretions produced by sap-feeding insects without having made the original punctures.
Use several visual features for identification: body shape, number and type of legs, wing position, markings, approximate size, behavior and the plant part occupied. Life stage matters because larvae and adults can look and feed differently. If identification remains uncertain, keep the record at a broader level instead of forcing a species name.
Evening four: separate culprits, helpers and bystanders
Sort observations into three temporary columns. A likely plant feeder has been seen causing matching injury or repeatedly occupies fresh damage. A likely helper is hunting, parasitizing or otherwise consuming likely feeders. A bystander has no demonstrated connection. These labels remain provisional.
Pay special attention to eggs and immobile stages. One unfamiliar cluster may belong to a plant feeder, while another may develop into a useful predator. Removing every egg, web or cocoon on sight can erase natural control. When you cannot distinguish them, isolate the observation with a photograph and delay irreversible action unless the plant faces rapid, serious harm.
Evening five: test one reversible change
Choose a tactic that matches the evidence and changes only one important variable. A lightweight physical barrier may protect seedlings if it does not exclude needed pollinators during flowering. Hand removal can work for a small, positively identified group when the organism is safe to handle with an appropriate tool and gloves. A sharp water stream may dislodge some soft-bodied insects from sturdy plants, provided repeated wetting will not worsen disease risk.
Other tests address conditions rather than organisms: water at the appropriate time and depth for the plant, reduce persistent moisture against a vulnerable stem, remove badly infested fallen material or correct dense contact between foliage and the ground. Do not improvise homemade chemical mixtures. Familiar household ingredients can injure leaves, harm non-target life or expose people and pets when used in untested concentrations.
Evening six: trace routes and habitat
Inspect outward from the plant. Follow slime traces, clipped pieces or repeated travel lines. Check gaps under a gate, branches touching a wall, weeds bridging into a bed and pots that keep the surface continuously damp. Look for stressed plants crowded beyond their mature spacing. A pest episode often reflects an accessible route plus favorable shelter, not simply the presence of a hungry organism.
Improve the condition only when the change fits the plant and the evidence. Secure a barrier, raise a container for drainage or thin diseased growth with clean tools. Avoid stripping away every leaf, log and groundcover in pursuit of tidiness; those features can shelter predators and other useful life. The investigation seeks a targeted correction, not an ecologically empty yard.
Evening seven: decide using an action threshold
An action threshold is the point at which observed damage, risk or population justifies intervention. It should reflect the plant’s purpose and ability to recover. A few holes in mature ornamental foliage may be tolerable. Repeated clipping of newly emerged seedlings may not be. Damage on an edible portion, a rapid decline in a valued specimen or an organism that poses a genuine health concern changes the decision.
Compare the baseline with evening seven. Count new injuries rather than total old scars. Note new growth, flowers and overall vigor. Then choose one of four outcomes: continue observing, maintain the successful preventive change, apply a more specific low-risk control or obtain expert identification. “Do nothing yet” is a legitimate, evidence-based decision when damage is stable and the plant is thriving.
Read damage as a pattern
Chewing removes tissue. Large smooth arcs, tiny interior holes and skeletonized leaves are different signatures, but none identifies a species alone. Piercing and sucking can produce stippling, yellowing, distortion or sticky residue. Leaf miners leave trails within tissue; borers may create entry holes, frass-like material or dieback beyond an affected point. Root injury can resemble drought even when moisture is present.
Context prevents overconfidence. Wind can tear leaves along veins. Hail can puncture a whole exposed surface at once. Sun, cold, salt, nutrient imbalance, root damage and fungal or bacterial disease can mimic feeding. Slime, droppings, webbing or eggs strengthen a biological case, yet even those clues need to match fresh injury and timing.
For larger visitors, tracks, tooth marks, digging style and browsing height can be more useful than a distant sighting. Do not deploy indiscriminate traps or poison where pets, children or wildlife could encounter them. Local rules may protect certain animals or regulate relocation. A qualified local professional is the safer route when identification, legality or humane handling is uncertain.
Turn the log into an evidence matrix
At the end of the week, summarize each suspect with six questions: Was it seen causing damage? Does the damage match its feeding style? Was it present when new injury appeared? Is it numerous enough to explain the change? Did a reversible intervention alter the damage rate? Are there competing explanations?
A confirmed feeder will answer several questions convincingly. A creature photographed once near an old wound will not. Also document beneficial activity and plant recovery. If predators increase while damage stabilizes, immediate broad treatment could interrupt a control process already working.
Keep the photographs and one-page summary for the next season. The record is most valuable when it captures the sequence, not merely the final label. It can reveal that a recurring problem begins after a particular irrigation change or at the same growth stage each year, allowing prevention before injury becomes serious.
If a pesticide enters the decision
Consider a pesticide only after the pest is identified, the damage exceeds the chosen threshold and suitable nonchemical steps have not provided adequate control. Select a product whose label specifically permits the intended plant or site and lists the target pest or use. The label defines application rate, timing, protective equipment, re-entry conditions, environmental precautions, storage and disposal. Follow every direction exactly.
Never increase the dose, combine products unless the labels explicitly allow it, transfer a pesticide into a food or drink container or apply in conditions that could carry it beyond the target. Protect pollinators and aquatic life according to label restrictions. Keep people and animals out of the treated area for the stated period. Use only the protective equipment the label requires, fitted and worn correctly.
Avoid “just in case” treatment of the entire garden. A narrow, well-timed application to a confirmed problem generally exposes fewer non-target organisms than a broad routine spray, but it still requires judgment. If the directions are unclear, the plant is near a pond or edible harvest, weather conditions are unsuitable or you cannot prevent access by children and pets, pause and seek qualified advice.
Know when the investigation should stop
Do not approach an active stinging nest, a potentially venomous animal, aggressive wildlife or an area contaminated by droppings. Rapid tree decline, structural wood damage, widespread turf failure, suspected regulated pests and repeated injury that cannot be identified warrant professional assessment. Sudden exposure symptoms after any pesticide contact require immediate attention through the emergency or poison-assistance service appropriate to your location.
For ordinary plant questions, a diagnostic service, horticulture professional or experienced local garden adviser can interpret clear photographs and a precise log far better than a vague description. Provide the plant name if known, the affected part, timing, recent care, damage progression and close and wide views. The seven-evening record turns “something is eating my garden” into a testable case.
A healthier result than a quick verdict
The most important outcome may be discovering that the alarming visitor is not responsible, that the plant is outgrowing the injury or that one small habitat adjustment stops new damage. It may also be confirming a pest early enough for a focused response. In every case, the investigation replaces reflex with proportion.
A garden’s night shift is busy, untidy and mostly unseen. Watching it for one week reveals relationships that a single morning inspection cannot. By mapping symptoms, testing a reversible change and setting an honest action threshold, a homeowner can protect plants without treating every living thing as an enemy—and reserve stronger control for the moments when evidence truly supports it.